My Kuberenetes Cluster Setup


Introduction
Towards the end of April this year, I got accepted into the Andela Kubernetes African Developer Training & Certification program, in partnership with the Cloud Native Computing Foundation. I have previously used minikube and k3d to run kubernetes locally for quite sometime, these tools mostly handle alot of the configuration and the behind the scenes stuff, giving that 'managed kubernetes' vibe. I therefore saw this as an opportunity to try out something new, because why not? Bootstrap a multi-node kubernetes cluster from scratch. Have a seperate worker node and a seperate master node running the control plane and get the two talking. I will be using the words VM, Virtual Machine and instances interchangibly throught this writeup to refer to the same thing.
Initial Setup
First off, I needed infrastructure. Somewhere to run the workloads on, because as at the time of writting this, kubernetes still needs some place to run its stuff on. We'll talk about that stuff in a second.
Two VM's will do just fine, one for the control plane and the other for the data plane. I happened to have everyone's favourite good old type-2 hypervisor with me, kids call it VirutalBox these days. Fire up two fedora instances install kubernetes and get it working right? Oh How I wish 😅, Or in the famous words of Jean Hanff Korelitz, "There are some things you just have to try. Try and fail. Try and fail better".

Networking
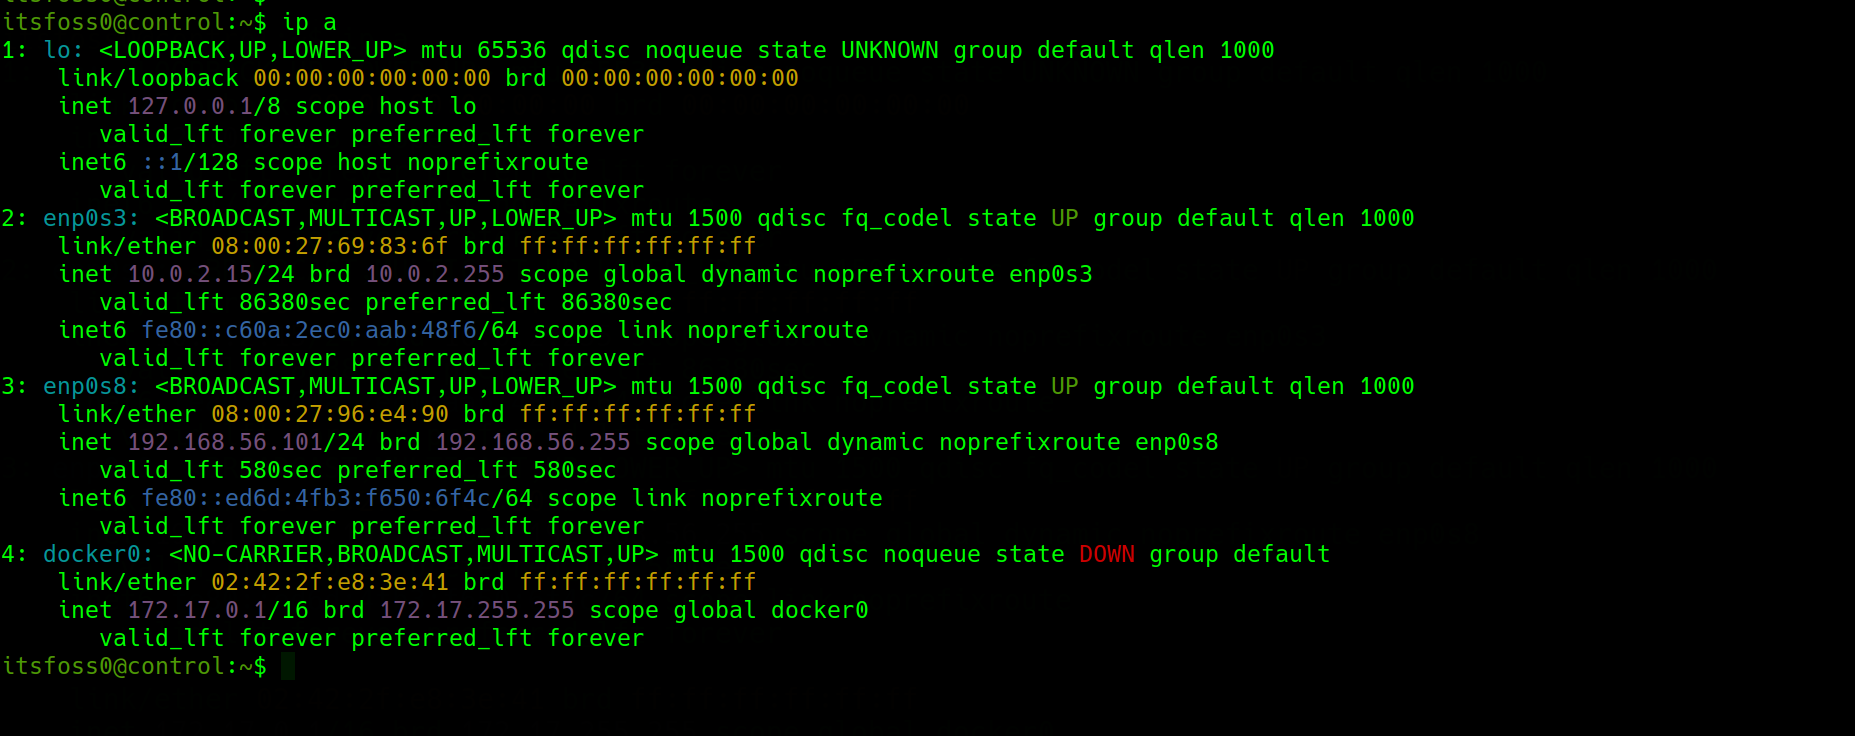
- Internet Access: I'd be pulling alot of the control plane's component from a container registry, so it goes without saying that internet access is needed. For this, I configured my VM's to have a NAT Network interface attached to one of it's adapters.
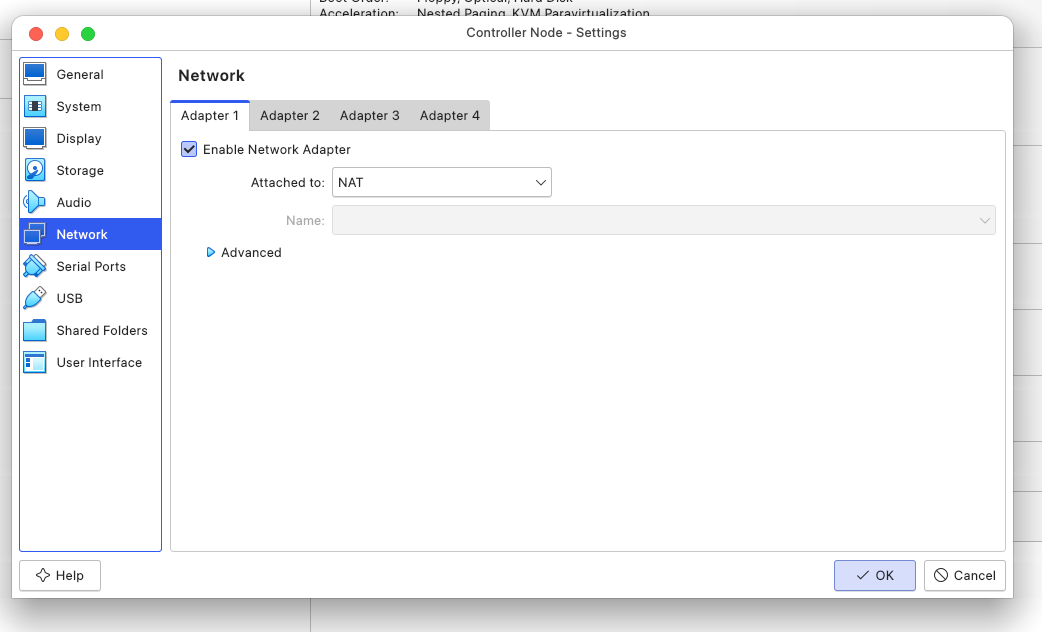
- Host & Node to Node communication: Unfortunately, the NAT Interface attached creates a unique private network for each node it's connected to. Every guest in NAT mode is connected to the host via its own virtual router with an inbuilt D.H.C.P server which somehow assigns a very specific IP to the guest. That's how we end up with two nodes, each having an IP Address of
10.0.2.15. Also, the nodes won't reach each other since they each are in an isolated network private and even if they somehow could, they wouldn't know who10.0.2.15is unless we changed it somehow. There's an awesome writeup from the virutal box forum that visually explains this very well. Not to mention I'd need to ssh into the nodes from my host and NAT Interface doesn't connect the guest VM to the host. I added another adapter, attached to a Host-Only network to both of the instances, which addresses the VM to host and VM to VM interconnection problem.
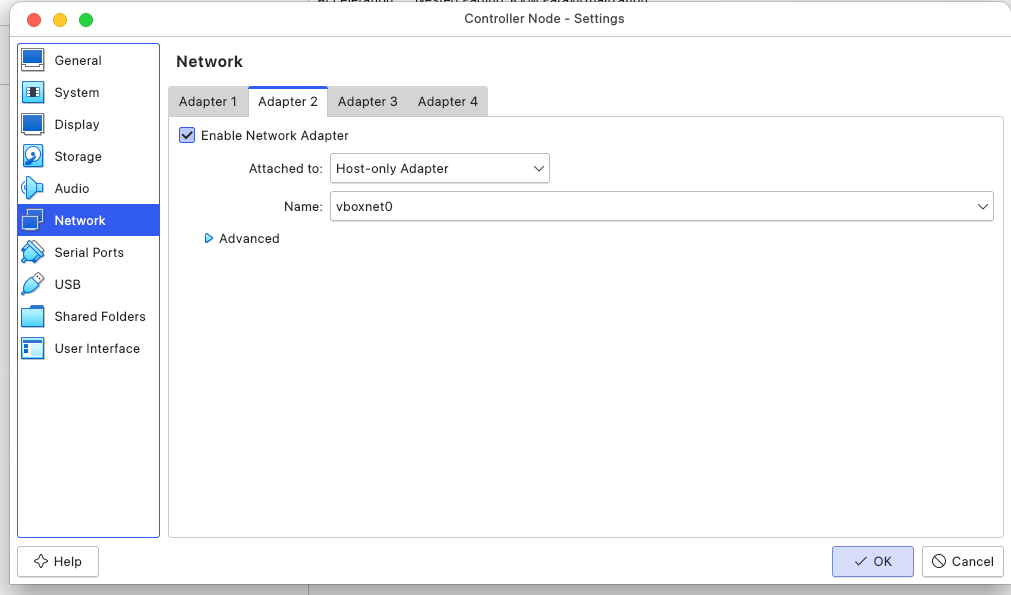
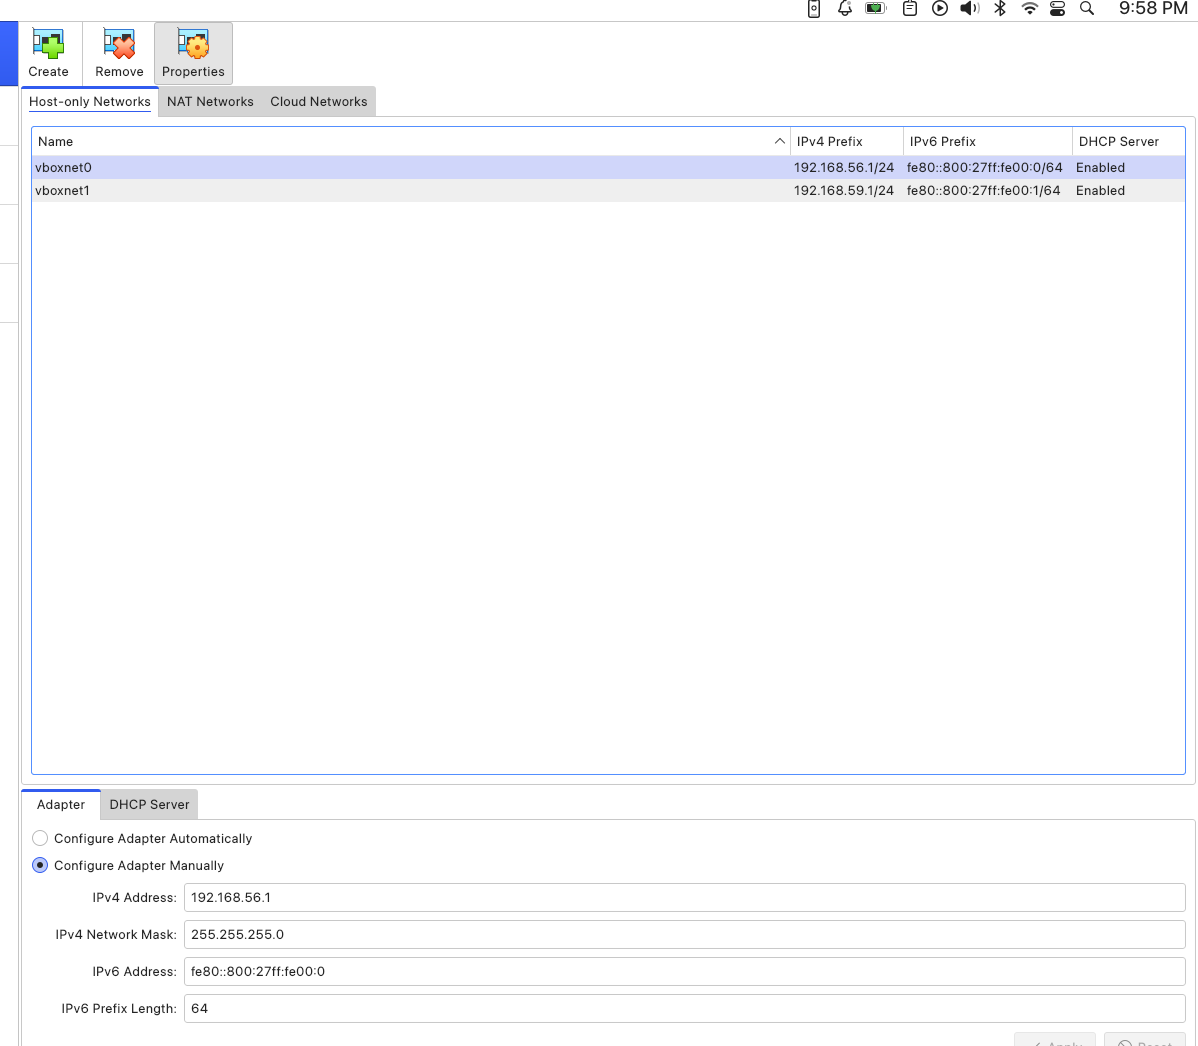
I should mention that before attaching the Host-Only Adapter to the VM's, I had to create a Host-Only Network from the Network Manager, with an IP address 192.168.56.1 and a subnet mask of 255.255.255.0. Which meant I could possibly add upto 254 nodes to this network, I only needed 2.
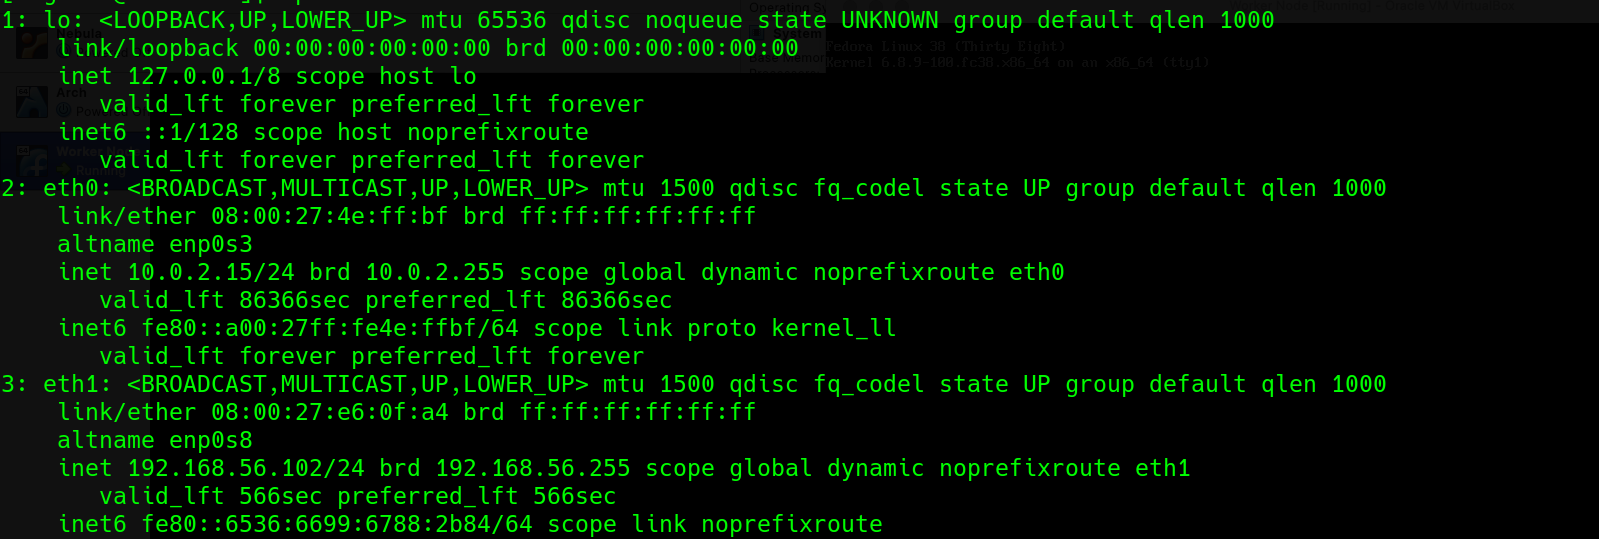
With this setup, each of the guests had two IPs, for each interface and the first address in the Host-Only Network I created was assigned to the Host OS. Here, take a look.
-
Host with Host-Only ip

-
Worker with two IP addresses
-
Controller with two IP address
SSH
The VMs have an ssh service enabled and running by default, no suprises there, just needed to configure my ssh client on the host for easy access to the instances. I ended up with this file at the $HOME/.ssh/config
Host *
     ServerAliveInterval 50

Host control
  HostName 192.168.56.101
  port 22
  User itsfoss0
  IdentityFile /home/user/.ssh/id_rsa

Host worker
  HostName 192.168.56.102
  port 22
  User worker
  IdentityFile /home/user/.ssh/id_rsa
This way, I can ssh worker or ssh control without having to pass all those ssh arguments. God know's I don't like arguments, I never win them 😁
Installation
Remember that kubernetes "stuff" I had promised to talk about at the start, well, it's time.

Kubernetes has a bunch of moving parts, which work together to make us cry, among other things like managing containers at scale.
-
kube-apiserver: Exposes the kuberenetes API and acts a primary point of interaction for all components and users. What this means is that it accepts requests, validates them and co-ordinates communication among the other components. Think of it like the brain of the cluster, processing all decisions
-
etcd: This is a highly available key-value store that stores the state of the cluster. It acts as a single source of truth for the cluster's state and configuration data. Think of it as a the human memory keeping track of all long term information. Now the human brain may be the somewhat similar to the memory, but lucky for us kubernetes doesn't have much to do with biology and neither do I. I do hope howevever you get the difference.
-
kube-controller Manager Continously runs a loop to check if everything is OK in the cluster ( matches etdc) and triggers actions if they don't.
-
kube-scheduler: Finds workloads not yet bound to a node and assigns them them to a suitable one. Think of it as the nervous system, sending signals to body parts. In the same way, the kube-scheduler checks to see where the signal (Pod) should go (scheduled).
-
cloud-controller-manager: Interfaces with third party sevices like cloud provider, it's also optional. You can think of this as assistive devices like hearing aids and spectacles.
-
kubelet: This runs on each node, not just the control plane to make sure containers are running and health. It talks to the API to make sure all containers are running as expected, monitors them and reports back. It goes "Am I running the right pods? Are they healthy? Is everything working on this node?"
-
kube-proxy: Makes sure pods and services can communicate with each other. It handles routing and load balancing. Think of this a blood vesels, relaying blood to every part of the body.
Now, I could go on and talk about the human body, but my Mom might catch wind of that and try to convince me to enroll in med-school, so I won't. I will instead summarize the kubernetes components and move on.
API Server 🧠 thinks
etcd 💾 remembers
Scheduler 😱 reacts
Controller Manager ⚖️ maintains balance
Cloud Controller 🌧️ talks to the outside world
kubelet 🫀 makes sure everything is working fine on each node
kube-proxy 🩸 relays signals
All of these components (except for the cloud controller manager) are needed, so the logicall next step is to install them. But first I had to disable swap permanently. Kubernetes recommends that swap be disabled for performance reasons
I should mention that most of these commands are specific to fedora systems and some of them have been copied directly from the fedora documentation
Also, I needed to disable the firewall, kubeadm would scream some warnings if I tried with a firewall on. Since this is a learning environment, there's no risk associated with turning off the firewall, fedora uses firewalld by default.
sudo systemctl disable --now firewalld
Next, I installed iptables and configured ipv4 forwarding and bridge filters. This is to ensure packets on other nodes get routed appropriately and that pods with private IPs can communicate with external services (The internet)
sudo dnf install iptables iproute-tc
sudo cat <<EOF | sudo tee /etc/modules-load.d/k8s.conf
overlay
br_netfilter
EOF
Load overlay and bride filter kernel modules.
sudo modprobe overlay
sudo modprobe br_netfilter
Add sysctl parameter and reload without a reboot
# sysctl params required by setup, params persist across reboots
sudo cat <<EOF | sudo tee /etc/sysctl.d/k8s.conf
net.bridge.bridge-nf-call-iptables  = 1
net.bridge.bridge-nf-call-ip6tables = 1
net.ipv4.ip_forward                 = 1
EOF
sudo sysctl --system
Installing a container runtime and container-networking plugins
sudo dnf install cri-o containernetworking-plugins
Installing kubectl kubeadm and kubelet. Kubectl is a tool to interact with the API server, kubeadm is a utility to bootrap a cluster and we've already established what a kubelet is.
sudo dnf install kubernetes kubernetes-kubeadm kubernetes-client
Start and enable crio to start automatically the VM boots using systemd
sudo systemctl enable --now crio
Do the same for the kubelet
sudo systemctl enable --now kubelet
Initialize the cluster with kubeadm
sudo kubeadm init --apiserver-advertise-address=192.168.56.101 --pod-network-cidr=10.244.0.0/16
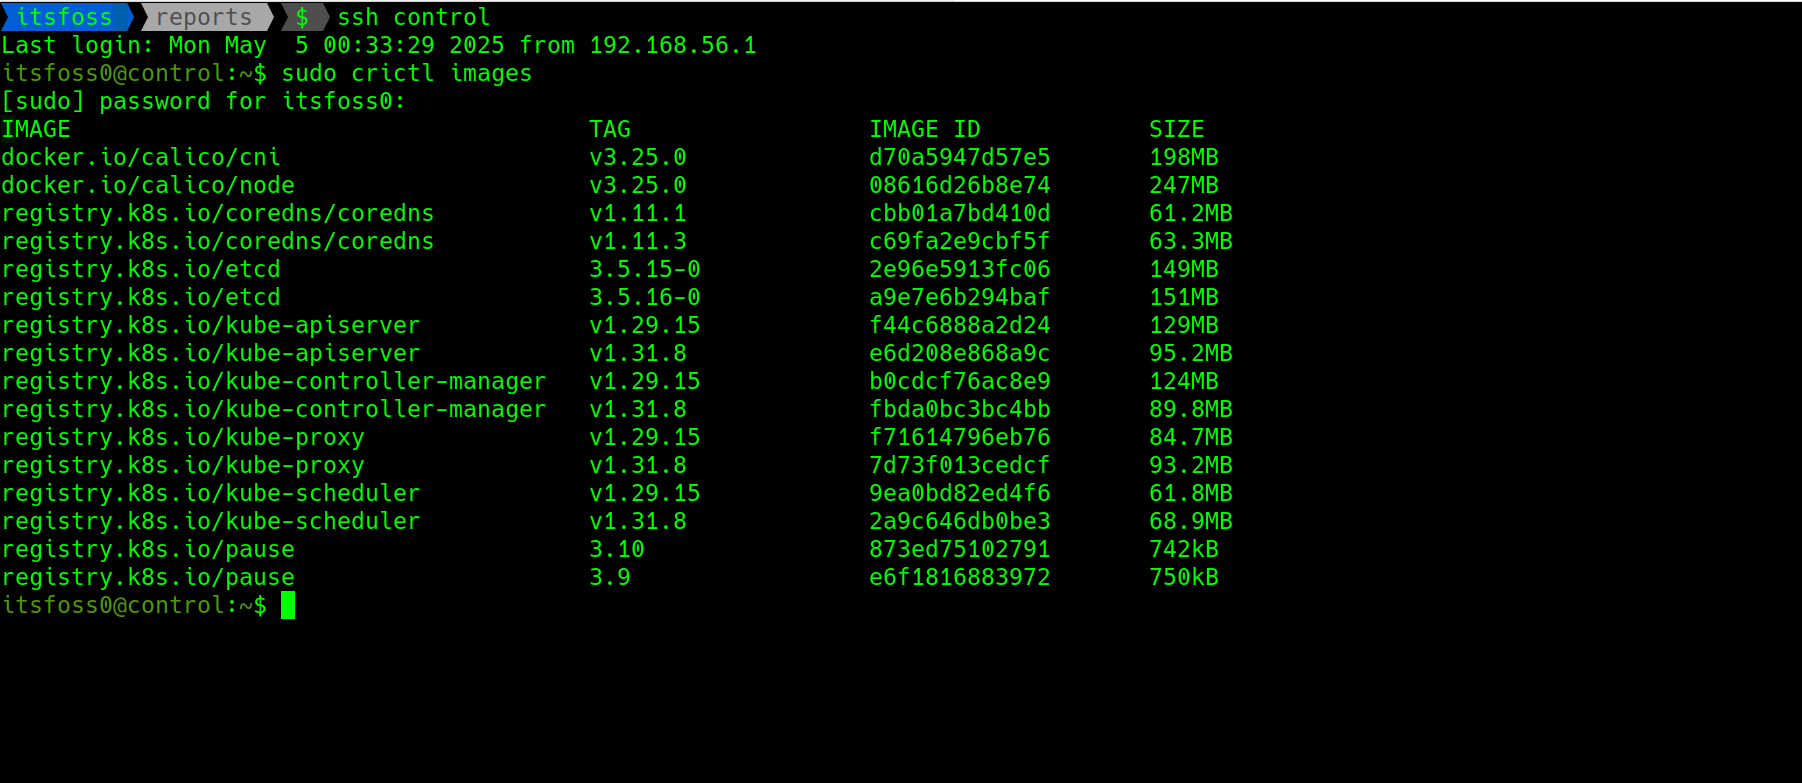
The --apiserver-advertise-address is so that the API server listens on that address, remember the V.M has two interfaces and the other interface has an IP address which is similar to the worker node, it would cause problems when trying to join the worker to the cluster. This command will pull the components mentioned earlier from a registry and run them. In addition, it will also log the command for adding a worker node to the cluster we just created. Take note of the command, it contains a token that's valid for 24 hours.
Sort of looks like this
kubeadm join 192.168.56.101:6443 --token n2mg2y.su --discovery-token-ca-cert-hash sha256:aab7a0b388067c401
List of images pulled when the command ran
The command also generates some commands to run before using the cluster. Basically to allow a non root user to use the kubectl command to interact with cluster
mkdir -p $HOME/.kube
sudo cp -i /etc/kubernetes/admin.conf $HOME/.kube/config
sudo chown $(id -u):$(id -g) $HOME/.kube/config
Repeat the above commands except for the initialing one on the worker VM, then join using the join command that was logged on the control node when the cluster was initialized with kubeadm.
The final step was to install a CNI, calico sounds fun, it has a really awesome documentation and huge community support. The CNI creates and manages the network that allows pods to talk to each other across nodes. It also handles assignment of IP addresses to pods and manages the address space.
kubectl apply -f https://raw.githubusercontent.com/projectcalico/calico/v3.25.0/manifests/calico.yaml
For some good reason, I always setup aliases and autocomplete for kubectl
#!/usr/bin/env bash

# aliases and autocomplete

alias kaf='kubectl apply -f'
alias kgs='kubectl get services'
alias kgp='kubectl get pods'
alias kgn='kubectl get nodes'
alias kgd='kubectl get deployments'
alias kga='kubectl get all'
alias ks='kubectl set'
alias kn=kubectl-neat
alias kd='kubectl delete'
alias kl='kubectl label'
alias kx='kubectl exec'
alias k=kubectl

source <(kubectl completion bash)
complete -F __start_kubectl k
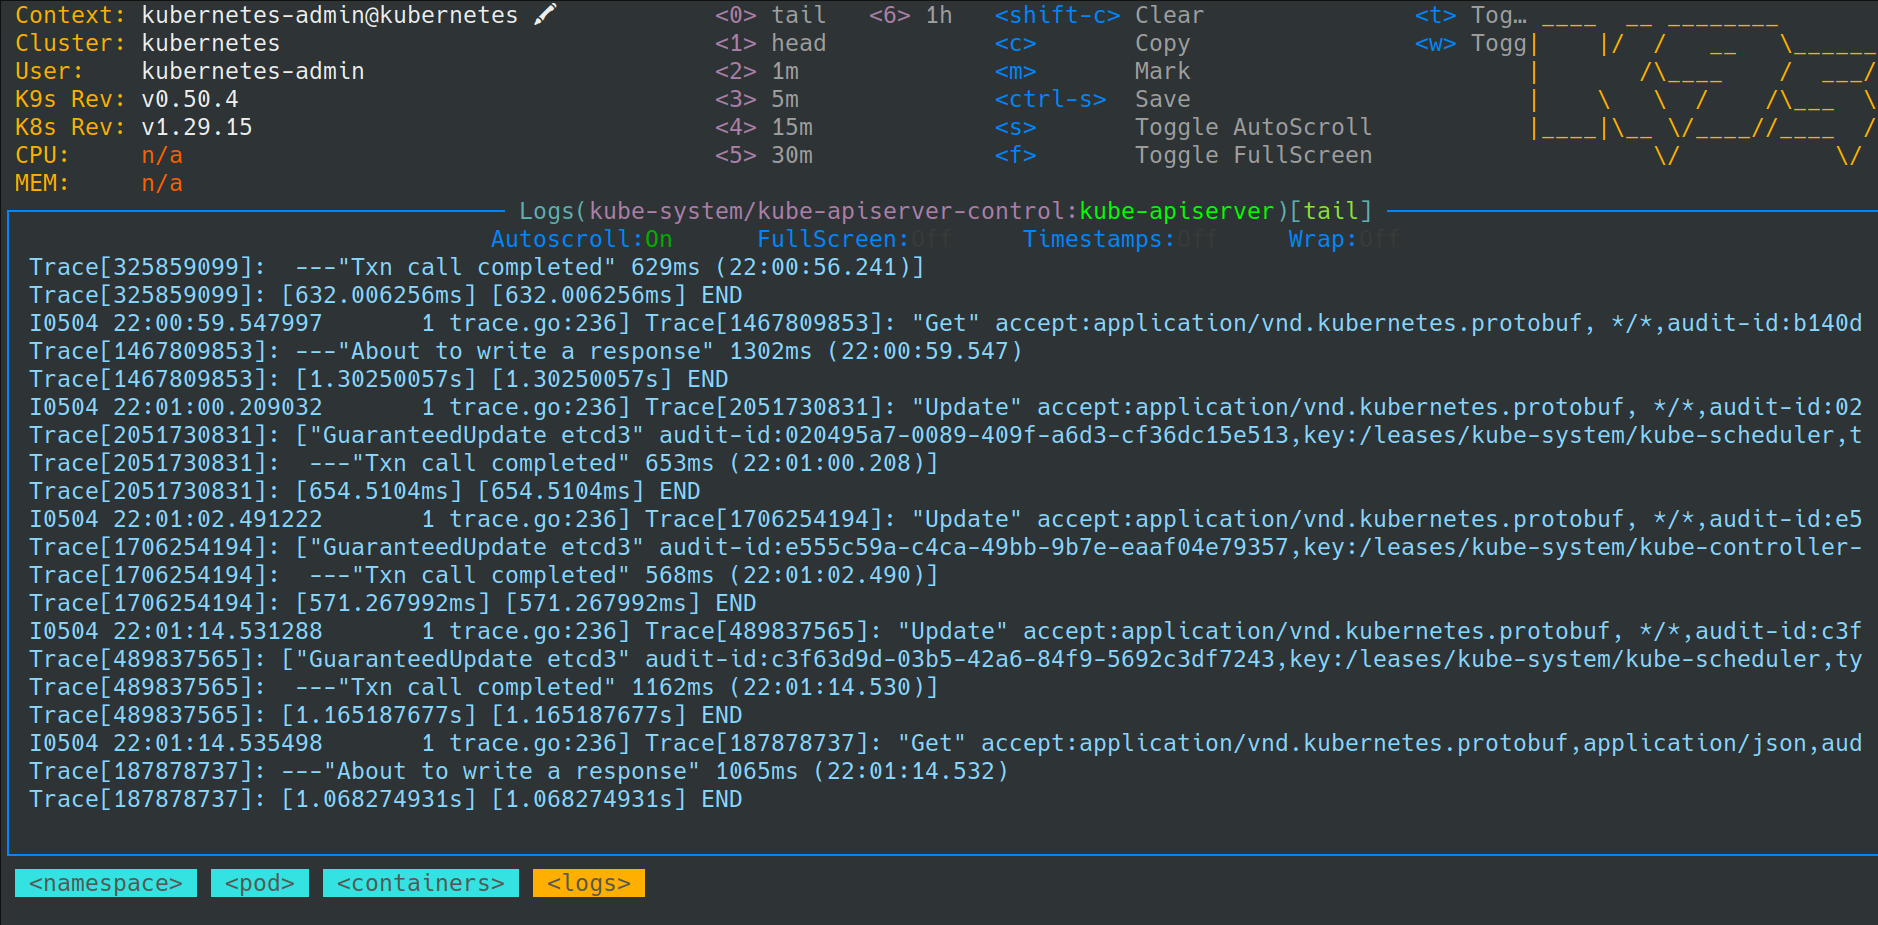
Another handy tool I used is k9s. It provides a TUI for managing the cluster, viewing logs, debugging and alot of other fun stuff. The snap version of it is somewhat messed up so I had to install it with brew.
Challenges
After installing the CNI, I had expected all pods across all namespaces to be running smoothly. But where's the fun in that, kubernetes had a reputation to keep. 😅 A quick inspection showed coreDNS in the good old CrashLoopBackOff dance.

Apparently, kubernetes was trying to protect me from coreDNS's "query of death" which could potentially hog all of CPU and memory. See, coreDNS had been caught in this loop, where it was sending random a probe query to it's self and then keep track of how many times it sees it. If the count is more than twice, then it had forwarded the requests to itself via a loopback address. The coreDNS team recommends a "quick dirty fix" of editing the Corefile to replace the local forward . /etc/resolv.conf file with an upstream DNS, so that the queries don't end up being forward back to itself via loopback.
kubectl edit configmap coredns -n kube-system
The real challenge howevever, was trying to edit the config with nano. The above command popped up a nano editor which I struggled with because I hadn't used nano in years. I'm more of a vim guy so you can guess how well that went.
And that my friends is a wrap, I'd like to thank you for reading to this point. See you in the next one